Showing posts sorted by relevance for query laravel 8. Sort by date Show all posts

Laravel 8 Auth using Jetstream Example

Laravel 8 Auth using Jetstream Example

Hi Dev,

Today, I will show you laravel 8 authentication using jetstream. In this blog, I will give you simple example of laravel 8 auth with jetstream. you can see jetstream with auth in laravel 8 application. i would like to share with you laravel 8 jetstream auth with inertia.

Few days ago laravel 8 realeased and they provides lot's of new updates. laravel 7 was using laravel/ui for auth scaffolding and now laravel 8 provide jetstream for login, registration, email verification, two-factor authentication, session management, API support and team management.

Laravel 8 designed by Tailwind CSS and they provide auth using livewire and Inertia. i will show you how to add auth in laravel 8. you can easily create laravel auth with jetstream step by step.

Here I will give full example for jetstream with auth in laravel 8, So let's follow bellow step by step.

Laravel 8 Auth Scaffolding using Livewire Jetstream

Laravel Livewire is a library that makes it simple to build modern, reactive, dynamic interfaces using Laravel Blade, Laravel controller and Laravel validation.

Livewire provide way to write your ajax with laravel blade, validation and all, you can use as javascript framework. so let's see bellow step to create auth using laravel 8 livewire.

Install Laravel 8:

Here you can install laravel 8 application using bellow command to get laravel 8:

composer create-project --prefer-dist laravel/laravel blog
Install Jetstream:

Now, you can install jetstream using bellow command so lets open terminal and run bellow command:

composer require laravel/jetstream
Create Auth with Livewire:

Now we need to create authentication using bellow command you can create basic login, register and email verification. if you want to create team management then you have to pass addition parameter. you can see bellow commands:

php artisan jetstream:install livewire
  
OR
  
php artisan jetstream:install livewire --teams

Now, let's node js package:

npm install

let's run package:

npm run dev

Now, we have to need migration so let's bellow artisan command to migrate database:

php artisan migrate

Now, you can run and check. they installed all views, actions and all in your laravel 8 application.

Laravel 8 Auth Scaffolding using Inertia Jetstream

Laravel Inertia is a templating language and Inertia is working with vue js.

Install Laravel 8:

Here you can install laravel 8 application using bellow command to get laravel 8:

composer create-project --prefer-dist laravel/laravel blog
Install Jetstream:

Now, you can install jetstream using bellow command so lets open terminal and run bellow command:

composer require laravel/jetstream
Create Auth with Inertia:

Now we need to create authentication using bellow command you can create basic login, register and email verification. if you want to create team management then you have to pass addition parameter. you can see bellow commands:

php artisan jetstream:install inertia
  
OR
  
php artisan jetstream:install inertia --teams

Now, let's node js package:

npm install

let's run package:

npm run dev

Now, we have to need migration so let's bellow artisan command to migrate database:

php artisan migrate

Now, you can run and check. they installed all views, actions and all in your laravel 8 application.

Laravel 8 Jetstream Features

Laravel 8 jetstream provides lot's of features. you can see all features in configuration file fortify.php and jetstream.php file where you can enable and disable option for that feature:

config/fortify.php
....
  
'features' => [
        Features::registration(),
        Features::resetPasswords(),
        Features::emailVerification(),
        Features::updateProfileInformation(),
        Features::updatePasswords(),
        Features::twoFactorAuthentication(),
    ],
...
config/jetstream.php
....
  
'features' => [
        Features::profilePhotos(),
        Features::api(),
        Features::teams(),
    ],
...

Now you can run your application by bellow command:

php artisan serve

It will help you...

Laravel 8 Barcode Generator Example

Laravel 8 Barcode Generator Example

Hi Dev

Today,I will learn you how engender barcode in laravel 8 we will show barcode engenderer example in laravel 8.I will engenderer barcode useing milon/barcode package in laravel 8. laravel 8 barcode engenderer example. in this tutorial, i would relish to show you how to engender or engender barcode in laravel 8 utilizing milon/barcode package.

In this blog, i will utilize milon/barcode package to engender simple, text, numeric and image barcode in laravel 8 app.

Step 1 : Install Laravel 8 Application

we are going from scratch, So we require to get fresh Laravel application using bellow command, So open your terminal OR command prompt and run bellow command:

composer create-project --prefer-dist laravel/laravel blog
Step 2 :Database Configuration

In this step, configure database with your downloded/installed laravel 8 app. So, you need to find .env file and setup database details as following:

DB_CONNECTION=mysql
DB_HOST=127.0.0.1
DB_PORT=3306
DB_DATABASE=db name
DB_USERNAME=db user name
DB_PASSWORD=db password
Step 3 :Installing Barcode Generator Package

Now In this step, install milon/barcode package in laravel 8 app via following command.

composer require milon/barcode
Step 4:Configure Barcode Generator Package

Here In this step,I will configure the milon/barcode package in laravel 8 app. So, Open the providers/config/app.php file and register the provider and aliases for milon/barcode.

'providers' => [
    ....
    Milon\Barcode\BarcodeServiceProvider::class,
],
  
'aliases' => [
    ....
    'DNS1D' => Milon\Barcode\Facades\DNS1DFacade::class,
    'DNS2D' => Milon\Barcode\Facades\DNS2DFacade::class,
]
Step 5:Create Routes

In this step,we will add the bar code generation routes in web.php file, which is located inside routes directory:

use App\Http\Controllers\BarcodeController;
Route::get('/barcode', [BarcodeController::class, 'index'])->name('barcode.index');
Step 6: Creating BarCode Controller

Now this step,I will create generate barcode controller file by using the following command.

php artisan make:controller BarCodeController

After navigate to app/http/controllers and open BarCodeController.php file. And add the simple barcode generation code into it.

<?php

namespace App\Http\Controllers;

use Illuminate\Http\Request;

class BarcodeController extends Controller
{
    public function index()
    {
      return view('barcode');
    }
}
Step 7 :Create Blade View

In this last step , create barcode-generator blade view file inside resources/views directory. And then add the following code into it.

<!DOCTYPE html>
<html>
<head>
  <title>Laravel 8 Barcode Generator</title>
</head>
<body>
<div class="container text-center">
  <div class="row">
    <div class="col-md-8 offset-md-2">
       <h1 class="mb-5">Laravel 8 Barcode Generator</h1>
       <div>{!! DNS1D::getBarcodeHTML('4445645656', 'C39') !!}</div></br>
       <div>{!! DNS1D::getBarcodeHTML('4445645656', 'POSTNET') !!}</div></br>
       <div>{!! DNS1D::getBarcodeHTML('4445645656', 'PHARMA') !!}</div></br>
       <div>{!! DNS2D::getBarcodeHTML('4445645656', 'QRCODE') !!}</div></br>
    </div>
  </div>
</div>
</body>
</html>

Now we are ready to run our custom validation rules example so run bellow command for quick run:

php artisan serve

Now you can open bellow URL on your browser:

http://localhost:8000/barcode

It will help you..

Laravel 8 Sanctum API Authentication Tutorial

Laravel 8 Sanctum API Authentication Tutorial

Hi Dev,

In this blog,I will learn you how to use sanctum api authenticationin laravel 8. We will Show example of sanctum api authentication in laravel 8. it's simple example of laravel 8 sanctum example. you'll learn laravel 8 sanctum rest api example. So, let's follow few step to create example of laravel 8 sanctum api token tutorial.

Laravel 8 Sanctum provides a simple authentication system for SPAs (single page applications), mobile applications, and simple, token based APIs. Sanctum also allows each user of your application to generate multiple API tokens for their account.

You also want to create api for your mobile application than you can follow this tutorial for how to create rest api step by step with laravel 8 and sanctum. If you are new than don't worry about that i written tutorial step by step.

Step 1 : Install Laravel 8

In the first step, we need to get fresh laravel 8 version application So let's open terminal and run bellow command to install fresh laravel project.

composer create-project --prefer-dist laravel/laravel blog
Step 2 : Database Configuration

In second step, we will make database Configuration for example database name, username, password etc. So lets open .env file and fill all deatils like as bellow:

.env
DB_CONNECTION=mysql
DB_HOST=127.0.0.1
DB_PORT=3306
DB_DATABASE=here your database name(blog)
DB_USERNAME=here database username(root)
DB_PASSWORD=here database password(root)
Step 1: Install Laravel 8

In this step we need to install sanctum via the Composer package manager, so one your terminal and fire bellow command.

composer require laravel/sanctum

After successfully install package, we need to publish configuration file with following command:

php artisan vendor:publish --provider="Laravel\Sanctum\SanctumServiceProvider"

we require to get default migration for create new sanctum tables in our database. so let's run bellow command.

php artisan migrate

Next, we need to add middleware for sanctum api, so let's add as like bellow:

app/Http/Kernel.php
....
'api' => [
    \Laravel\Sanctum\Http\Middleware\EnsureFrontendRequestsAreStateful::class,
    'throttle:api',
    \Illuminate\Routing\Middleware\SubstituteBindings::class,
],
....
Step 3: Sanctum Configuration

In this step, we have to configuration on three place model, service provider and auth config file. So you have to just following change on that file.

In model we added HasApiTokens class of Sanctum,

In auth.php, we added api auth configuration.

app/Models/User.php
<?php
  
namespace App\Models;
  
use Illuminate\Contracts\Auth\MustVerifyEmail;
use Illuminate\Database\Eloquent\Factories\HasFactory;
use Illuminate\Foundation\Auth\User as Authenticatable;
use Illuminate\Notifications\Notifiable;
use Laravel\Sanctum\HasApiTokens;
  
class User extends Authenticatable
{
    use HasFactory, Notifiable, HasApiTokens;
  
    /**
     * The attributes that are mass assignable.
     *
     * @var array
     */
    protected $fillable = [
        'name',
        'email',
        'password',
    ];
  
    /**
     * The attributes that should be hidden for arrays.
     *
     * @var array
     */
    protected $hidden = [
        'password',
        'remember_token',
    ];
  
    /**
     * The attributes that should be cast to native types.
     *
     * @var array
     */
    protected $casts = [
        'email_verified_at' => 'datetime',
    ];
}
Step 4: Add Food Table and Model

In this step, We require to create migration for posts table using Laravel 8 php artisan command, so first fire bellow command.

php artisan make:migration create_foods_table

After this command you will find one file in following path database/migrations and you have to put bellow code in your migration file for create Foods table.

<?php

use Illuminate\Database\Migrations\Migration;
use Illuminate\Database\Schema\Blueprint;
use Illuminate\Support\Facades\Schema;

class CreateFoodsTable extends Migration
{
    /**
     * Run the migrations.
     *
     * @return void
     */
    public function up()
    {
        Schema::create('foods', function (Blueprint $table) {
            $table->id();
            $table->string('name');
            $table->text('detail');
            $table->timestamps();
        });
    }

    /**
     * Reverse the migrations.
     *
     * @return void
     */
    public function down()
    {
        Schema::dropIfExists('foods');
    }
}

After create migration we need to run above migration by following command:

php artisan migrate

After create "foods" table you should create Food model for foods, so first create file in this path app/Models/Food.php and put bellow content in item.php file.

app/Models/Food.php
<?php

namespace App\Models;

use Illuminate\Database\Eloquent\Factories\HasFactory;
use Illuminate\Database\Eloquent\Model;

class Food extends Model
{
    use HasFactory;

    /**
     * The attributes that are mass assignable.
     *
     * @var array
     */
    protected $fillable = [
        'name', 'detail'
    ];
}
Step 5: Create API Routes
<?php
  
use Illuminate\Http\Request;
use Illuminate\Support\Facades\Route;
  
use App\Http\Controllers\API\RegisterController;
use App\Http\Controllers\API\FoodController;
  
/*
|--------------------------------------------------------------------------
| API Routes
|--------------------------------------------------------------------------
|
| Here is where you can register API routes for your application. These
| routes are loaded by the RouteServiceProvider within a group which
| is assigned the "api" middleware group. Enjoy building your API!
|
*/
  
Route::post('register', [RegisterController::class, 'register']);
Route::post('login', [RegisterController::class, 'login']);
     
Route::middleware('auth:sanctum')->group( function () {
    Route::resource('foods', FoodController::class);
});
Step 6: Create Controller Files

In this step, we have create new controller as BaseController, FoodController and RegisterController, i created new folder "API" in Controllers folder because we will make alone APIs controller, So let's create both controller.

app/Http/Controllers/API/BaseController.php
<?php

namespace App\Http\Controllers\API;

use App\Http\Controllers\Controller;
use Illuminate\Http\Request;

class BaseController extends Controller
{
    /**
    * success response method.
    *
    * @return \Illuminate\Http\Response
    */
    public function sendResponse($result, $message)
    {
    	$response = [
            'success' => true,
            'data'    => $result,
            'message' => $message,
        ];


        return response()->json($response, 200);
    }

    /**
     * return error response.
     *
     * @return \Illuminate\Http\Response
     */
    public function sendError($error, $errorMessages = [], $code = 404)
    {
    	$response = [
            'success' => false,
            'message' => $error,
        ];


        if(!empty($errorMessages)){
            $response['data'] = $errorMessages;
        }

        return response()->json($response, $code);
    }
}
app/Http/Controllers/API/RegisterController.php
<?php

namespace App\Http\Controllers\API;
use App\Http\Controllers\API\BaseController as BaseController;
use Illuminate\Http\Request;
use App\Models\User;
use Illuminate\Support\Facades\Auth;
use Validator;

class RegisterController extends BaseController
{
     /**
     * Register api
     *
     * @return \Illuminate\Http\Response
     */
    public function register(Request $request)
    {
        $validator = Validator::make($request->all(), [
            'name' => 'required',
            'email' => 'required|email',
            'password' => 'required',
            'c_password' => 'required|same:password',
        ]);
   
        if($validator->fails()){
            return $this->sendError('Validation Error.', $validator->errors());       
        }
   
        $input = $request->all();
        $input['password'] = bcrypt($input['password']);
        $user = User::create($input);
        $success['token'] =  $user->createToken('MyApp')->plainTextToken;
        $success['name'] =  $user->name;
   
        return $this->sendResponse($success, 'User register successfully.');
    }
   
    /**
     * Login api
     *
     * @return \Illuminate\Http\Response
     */
    public function login(Request $request)
    {
        if(Auth::attempt(['email' => $request->email, 'password' => $request->password])){ 
            $user = Auth::user(); 
            $success['token'] =  $user->createToken('MyApp')->plainTextToken; 
            $success['name'] =  $user->name;
   
            return $this->sendResponse($success, 'User login successfully.');
        } 
        else{ 
            return $this->sendError('Unauthorised.', ['error'=>'Unauthorised']);
        } 
    }
}
app/Http/Controllers/API/FoodController.php
<?php

namespace App\Http\Controllers\API;

use Illuminate\Http\Request;
use App\Http\Controllers\API\BaseController as BaseController;
use App\Models\Food;
use Validator;
use App\Http\Resources\Food as FoodResource;

class FoodController extends BaseController
{
     /**
     * Display a listing of the resource.
     *
     * @return \Illuminate\Http\Response
     */
    public function index()
    {
        $foods = Food::all();
    
        return $this->sendResponse(FoodResource::collection($foods), 'Foods retrieved successfully.');
    }
    /**
     * Store a newly created resource in storage.
     *
     * @param  \Illuminate\Http\Request  $request
     * @return \Illuminate\Http\Response
     */
    public function store(Request $request)
    {
        $input = $request->all();
   
        $validator = Validator::make($input, [
            'name' => 'required',
            'detail' => 'required'
        ]);
   
        if($validator->fails()){
            return $this->sendError('Validation Error.', $validator->errors());       
        }
   
        $food = Food::create($input);
   
        return $this->sendResponse(new FoodResource($food), 'Food created successfully.');
    } 
   
    /**
     * Display the specified resource.
     *
     * @param  int  $id
     * @return \Illuminate\Http\Response
     */
    public function show($id)
    {
        $food = Food::find($id);
  
        if (is_null($food)) {
            return $this->sendError('Food not found.');
        }
   
        return $this->sendResponse(new FoodResource($food), 'Food retrieved successfully.');
    }
    
    /**
     * Update the specified resource in storage.
     *
     * @param  \Illuminate\Http\Request  $request
     * @param  int  $id
     * @return \Illuminate\Http\Response
     */
    public function update(Request $request, Food $food)
    {
        $input = $request->all();
   
        $validator = Validator::make($input, [
            'name' => 'required',
            'detail' => 'required'
        ]);
   
        if($validator->fails()){
            return $this->sendError('Validation Error.', $validator->errors());       
        }
   
        $food->name = $input['name'];
        $food->detail = $input['detail'];
        $food->save();
   
        return $this->sendResponse(new FoodResource($food), 'Food updated successfully.');
    }
   
    /**
     * Remove the specified resource from storage.
     *
     * @param  int  $id
     * @return \Illuminate\Http\Response
     */
    public function destroy(Food $food)
    {
        $food->delete();
   
        return $this->sendResponse([], 'Food deleted successfully.');
    }
}
Step 7: Create Eloquent API Resources

Now In this step,This is a very important step of creating rest api in laravel 8. you can use eloquent api resources with api. it will helps you to make same response layout of your model object. we used in FoodController file. now we have to create it using following command.

php artisan make:resource Food

Now there created new file with new folder on following path:

app/Http/Resources/Food.php
<?php

namespace App\Http\Resources;

use Illuminate\Http\Resources\Json\JsonResource;

class Food extends JsonResource
{
     /**
     * Transform the resource into an array.
     *
     * @param  \Illuminate\Http\Request  $request
     * @return array
     */
    public function toArray($request)
    {
        return [
            'id' => $this->id,
            'name' => $this->name,
            'detail' => $this->detail,
            'created_at' => $this->created_at->format('d/m/Y'),
            'updated_at' => $this->updated_at->format('d/m/Y'),
        ];
    }
}

Now we are ready to to run full restful api and also passport api in laravel. so let's run our example so run bellow command for quick run:

php artisan serve

make sure in details api we will use following headers as listed bellow:

'headers' => [

    'Accept' => 'application/json',

    'Authorization' => 'Bearer '.$accessToken,
]
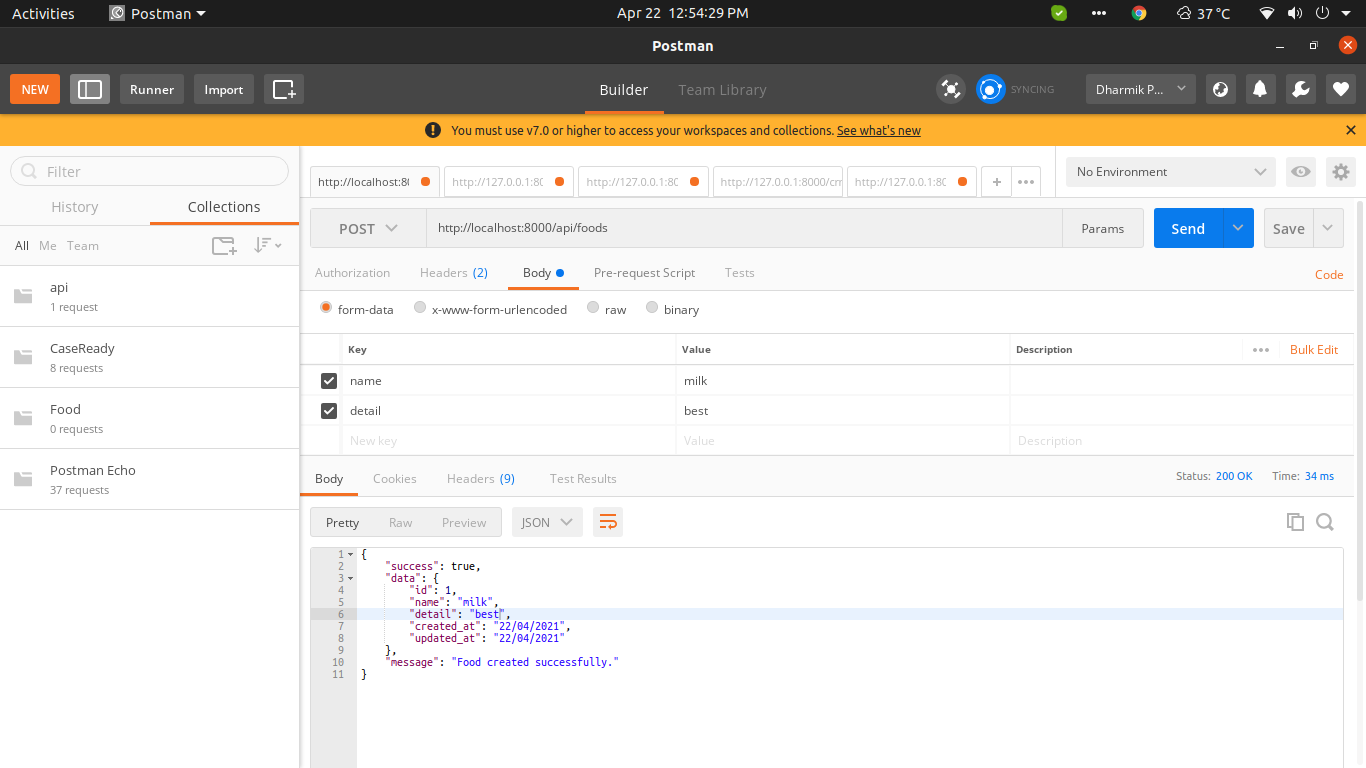
Now simply you can run above listed url like as bellow screen shot: 1) Register API: Verb:GET, URL:http://localhost:8000/api/register
Laravel 8 Sanctum API Authentication Tutorial
2) Login API: Verb:GET, URL:http://localhost:8000/api/login
Laravel 8 Sanctum API Authentication Tutorial
3) Food List API: Verb:GET, URL:http://localhost:8000/api/foods
Laravel 8 Sanctum API Authentication Tutorial
4) Food Create API: Verb:POST, URL:http://localhost:8000/api/foods
Laravel 8 Sanctum API Authentication Tutorial
5) Food Show API: Verb:GET, URL:http://localhost:8000/api/foods/{id}
Laravel 8 Sanctum API Authentication Tutorial
6) Food Update API: Verb:PUT, URL:http://localhost:8000/api/foods/{id}
Laravel 8 Sanctum API Authentication Tutorial
7) Food Delete API: Verb:DELETE, URL:http://localhost:8000/api/food/{id}
Laravel 8 Sanctum API Authentication Tutorial
It wiil help you....

Laravel 8 Generate QR Code Example

Hi Guys,

Today,I will learn you how create QR Code in laravel 8 we will show QR Code generator example in laravel 8.I will generator QR Code useing simplesoftwareio/simple-qrcode package in laravel 8. laravel 8 QR Code generator example. in this tutorial, i would like to show you how to generate or create QR Code in laravel 8 using simplesoftwareio/simple-qrcode package.

Using this simplesoftwareio/simple-qrcode package, you can generate simple qr code, qr code, image qr code, text qr code in laravel 8 app. As well as, you can send this qr codes in mail and text message.

In this tutorial, i will use simplesoftwareio/simple-qrcode package to generate simple, text, numeric and image qr code in laravel 8 app.

Step 1 : Install Laravel 8 Application

we are going from scratch, So we require to get fresh Laravel application using bellow command, So open your terminal OR command prompt and run bellow command:

composer create-project --prefer-dist laravel/laravel blog
Step 2 :Database Configuration

In this step, configure database with your downloded/installed laravel 8 app. So, you need to find .env file and setup database details as following:

DB_CONNECTION=mysql
DB_HOST=127.0.0.1
DB_PORT=3306
DB_DATABASE=db name
DB_USERNAME=db user name
DB_PASSWORD=db password
Step 3 :Installing qrcode Generator Package

Now In this step, install simplesoftwareio/simple-qrcode package in laravel 8 app via following command.

composer require simplesoftwareio/simple-qrcode
Step 4:Configure qrcode Generator Package

Here In this step,I will configure the simplesoftwareio/simple-qrcode package in laravel 8 app. So, Open the providers/config/app.php file and register the provider and aliases for milon/qrcode.

'providers' => [
    ....
    SimpleSoftwareIO\QrCode\QrCodeServiceProvider::class
],
  
'aliases' => [
    ....
    'QrCode' => SimpleSoftwareIO\QrCode\Facades\QrCode::class
]
Step 5:Create Routes

In this step,we will add the qr code generation routes in web.php file, which is located inside routes directory:

<?php
use App\Http\Controllers\QrCodeGeneratorController;
Route::get('/qr-code', [QrCodeGeneratorController::class, 'index']);
Step 6: Creating QrCode Controller

Now this step,I will create generate QrCode controller file by using the following command.

php artisan make:controller QrCodeGeneratorController

After navigate to app/http/controllers and open QrCodeGeneratorController.php file. And add the simple QrCode generation code into it.

<?php

namespace App\Http\Controllers;

use Illuminate\Http\Request;
use QrCode;

class QrCodeGeneratorController extends Controller
{
    public function index()
    {
      return view('qrCode');
    }
}
Step 7 :Create Blade View

In this last step , create qr-generator blade view file inside resources/views directory. And then add the following code into it.

<!DOCTYPE html>
<html>
<head>
  <title>Laravel 8 Qr Code Example</title>
  <link rel="stylesheet" href="https://maxcdn.bootstrapcdn.com/bootstrap/4.0.0/css/bootstrap.min.css" integrity="sha384-Gn5384xqQ1aoWXA+058RXPxPg6fy4IWvTNh0E263XmFcJlSAwiGgFAW/dAiS6JXm" crossorigin="anonymous">
</head>
<body>
  <div class="container">
    <div class="row text-center mt-5">
      <div class="col-md-6">
        <h4>Simple Qr Code</h4>
        {!! QrCode::size(250)->generate('Nicesnippets.com') !!}
      </div>
      <div class="col-md-6">
        <h4>Color Qr Code</h4>
        {!! QrCode::size(250)->backgroundColor(255,55,0)->generate('Nicesnippets.com') !!}
      </div>
    </div> 
  </div> 
</body>
</html>

Now we are ready to run our custom validation rules example so run bellow command for quick run:

php artisan serve

Now you can open bellow URL on your browser:

http://localhost:8000/qr-code
It will help you..

Laravel 8 Pagination Tutorial Example

Laravel 8 Pagination Tutorial Example

Hi Guys,

Today, I will learn you how to create pagination with laravel 8.If you want to full example of laravel 8 pagination example blade. if you have question about laravel 8 pagination with user table then i will give simple and easy example with solution for you. i explained simply step by step laravel 8 pagination tutorial. let’s talk about pagination in laravel 8.

We know pagination is a primary requisite of each and every project. so if you are a beginner with laravel than you must know how to utilize pagination in laravel 8 and what is other function that can utilize with laravel 8 pagination.

Now, In this example i will explain you from scratch how to working with laravel pagination. so let's follow bellow step by step tutorial for creating simple example of pagination with laravel 8.

Step 1: Add Route

First all of we put one route in one for list users with pagination. So simply add both routes in your route file.

routes/web.php
<?php
  
use Illuminate\Support\Facades\Route;
  
use App\Http\Controllers\ProductController;
  
/*
|--------------------------------------------------------------------------
| Web Routes
|--------------------------------------------------------------------------
|
| Here is where you can register web routes for your application. These
| routes are loaded by the RouteServiceProvider within a group which
| contains the "web" middleware group. Now create something great!
|
*/
  
Route::get('product', [ProductController::class, 'index']);
Step 2: Create Controller

Same things as above for route, here we will add one new method for route. index() will return users with pagination data, so let's add bellow:

app/Http/Controllers/ProductController.php
<?php
  
namespace App\Http\Controllers;
  
use Illuminate\Http\Request;
use App\Models\Product;
  
class ProductController extends Controller
{
    /**
     * Display a listing of the resource.
     *
     * @return \Illuminate\Http\Response
     */
    public function index()
    {
        $data = Product::paginate(5);
        return view('product.index',compact('data'));
    }
}
Step 3: Create Blade File

After create ProductController you need to create index blade file and put bellow code with links() so it will generate pagination automatically. So let's put it.

resources/views/index.blade.php
    
<!DOCTYPE html>
<html lang="en">
<head>
    <meta charset="UTF-8">
    <meta name="viewport" content="width=device-width, initial-scale=1.0">
    <title>Document</title>
    <link rel="stylesheet" href="https://maxcdn.bootstrapcdn.com/bootstrap/4.5.2/css/bootstrap.min.css">
    <link rel="stylesheet" href="https://cdnjs.cloudflare.com/ajax/libs/font-awesome/5.15.3/css/all.min.css" />
    <style type="text/css">
        .form-inline{
            display: inline;
        }
    </style>
</head>
<body class="bg-dark">
    <div class="container mt-5">
        <div class="row">
            <div class="col-md-12">
                <div class="card">
                    <div class="card-header">
                        <h3>Laravel 8 Pagination Example Tutorial</h3>
                    </div>
                    <div class="card-body">
                        <table class="table table-bordered table-hover">
                            <thead class="bg-secondary text-white">
                                <tr>
                                    <th>#</th>
                                    <th>Product Name</th>
                                    <th>Product Price</th>
                                    <th>Product Details</th>
                                    <th>Action</th>
                                </tr>
                            </thead>
                            <tbody>
                                @if(!empty($products) && $products->count())
                                    @foreach($products as $key => $product)
                                        <tr>
                                            <td>{{ ++$key }}</td>
                                            <td>{{ $product->name }}</td>
                                            <td>{{ $product->price }}</td>
                                            <td>{{ $product->details }}</td>
                                            <td>
                                                  <button class="btn btn-danger btn-icon">
                                                    <i class="far fa-trash-alt text-white" data-feather="delete"></i>
                                                  </button>
                                            </td>
                                        </tr>
                                    @endforeach
                                    @else
                                        <tr>
                                            <td colspan="10">There are no data.</td>
                                        </tr>
                                    @endif
                            </tbody>
                        </table>
                        {!! $products->links() !!}
                    </div>
                </div>
            </div>
        </div>
    </div>
</body>
</html>

Now you can run and check this example. it is a very simple and basic example.

If you are using bootstrap then you have to add useBootstrap() on service provider as like bellow:

app\Providers\AppServiceProvider.php
<?php
  
namespace App\Providers;
  
use Illuminate\Support\ServiceProvider;
use Illuminate\Pagination\Paginator;
  
class AppServiceProvider extends ServiceProvider
{
    /**
     * Register any application services.
     *
     * @return void
     */
    public function register()
    {
    
    }
    /**
     * Bootstrap any application services.
     *
     * @return void
     */
    public function boot()
    {
        Paginator::useBootstrap();
    }
}

If you need advance used of pagination then you can see bellow how to use.

Pagination with appends parameter

{!! $data->appends(['sort' => 'votes'])->links() !!}

Pagination with appends request all parameters

{!! $data->appends(Request::all())->links() !!}

You can also see in advance details from here: Laravel 8 Pagination.

It will help you..

Laravel 8 Resize Image Before Upload Example Tutorial

laravel 8 generate thumbnail image

Hi Guys,

Today, I will learn you how to resize image before upload in laravel 8. we will show example of resize image before upload in laravel 8.if you want to see example of laravel 8 generate thumbnail image then you are a right place. we will help you to give example of laravel 8 resize image before upload.I will explain step by step tutorial laravel 8 resize image.

We will give you simple example of laravel 8 image intervention example. you will do the following things for resize and upload image in laravel 8.

we will use intervention/image package for resize or resize image in laravel. intervention provide a resize function that will take a three parameters. three parameters are width, height and callback function. callback function is a optional.

Here, I will give you full example for simply resize image before upload using laravel as bellow.

Step 1: Install Laravel 8

Here In this step, If you haven't laravel 8 application setup then we have to get fresh laravel 8 application. So run bellow command and get clean fresh laravel 8 application.

composer create-project --prefer-dist laravel/laravel blog
Step 2: Install Intervention Image Package

n this step,I will install intervention/image for resize image. this package through we can generate thumbnail image for our project. so first fire bellow command in your cmd or terminal.

composer require intervention/image

Now we need to add provider path and alias path in config/app.php file so open that file and add bellow code.

config/app.php
return [
    ......
    $provides => [
        ......,
        ......,
        Intervention\Image\ImageServiceProvider::class
    ],
    $aliases => [
        ......,
        .....,
        'Image' => Intervention\Image\Facades\Image::class
    ]
]
Step 3: Create Routes

In this step,we will add routes and controller file so first add bellow route in your routes.php file.

routes/web.php
<?php
  
use Illuminate\Support\Facades\Route;
  
use App\Http\Controllers\ImageResizeController;
  
/*
|--------------------------------------------------------------------------
| Web Routes
|--------------------------------------------------------------------------
|
| Here is where you can register web routes for your application. These
| routes are loaded by the RouteServiceProvider within a group which
| contains the "web" middleware group. Now create something great!
|
*/
  
Route::get('resizeImage', [ImageResizeController::class, 'resizeImage']);
Route::post('resizeImagePost', [ImageResizeController::class, 'resizeImagePost'])->name('resizeImagePost');
Step 4: Create Controller File

In this step,Now require to create new ImageResizeController for image uploading and resizeing image so first run bellow command.

php artisan make:controller ImageResizeController

After this command you can find ImageResizeController.php file in your app/Http/Controllers directory. open ImageResizeController.php file and put bellow code in that file.

app/Http/Controllers/ImageResizeController.php
<?php
  
namespace App\Http\Controllers;
   
use Illuminate\Http\Request;
use App\Http\Requests;
use Image;
  
class ImageResizeController extends Controller
{
  
    /**
     * Show the form for creating a new resource.
     *
     * @return \Illuminate\Http\Response
     */
    public function resizeImage()
    {
        return view('resizeImage');
    }
  
    /**
     * Show the form for creating a new resource.
     *
     * @return \Illuminate\Http\Response
     */
    public function resizeImagePost(Request $request)
    {
        $this->validate($request, [
            'title' => 'required',
            'image' => 'required|image|mimes:jpeg,png,jpg,gif,svg|max:2048',
        ]);
  
        $image = $request->file('image');
        $input['imagename'] = time().'.'.$image->extension();
     
        $destinationPath = public_path('/thumbnail');
        $img = Image::make($image->path());
        $img->resize(100, 100, function ($constraint) {
            $constraint->aspectRatio();
        })->save($destinationPath.'/'.$input['imagename']);
   
        $destinationPath = public_path('/images');
        $image->move($destinationPath, $input['imagename']);
   
        return back()
            ->with('success','Image Upload successful')
            ->with('imageName',$input['imagename']);
    }
   
}
Step 5: View File and Create Upload directory

In this last step we will create resizeImage.blade.php file for photo upload form and manage error message and also success message. So first create resizeImage.blade.php file and put bellow code:

resources/views/resizeImage.blade.php
<!DOCTYPE html>
<html>
<head>
    <title>Laravel Resize Image Tutorial</title>
    <link rel="stylesheet" href="https://www.nicesnippets.com/adminTheme/bower_components/bootstrap/dist/css/bootstrap.min.css">
</head>
<body>
  
<div class="container">
    <h1>Laravel Resize Image Tutorial</h1>
    @if (count($errors) > 0)
        <div class="alert alert-danger">
            <strong>Whoops!</strong> There were some problems with your input.<br><br>
            <ul>
                @foreach ($errors->all() as $error)
                    <li>{{ $error }}</li>
                @endforeach
            </ul>
        </div>
    @endif
         
    @if ($message = Session::get('success'))
    <div class="alert alert-success alert-block">
        <button type="button" class="close" data-dismiss="alert">×</button>    
        <strong>{{ $message }}</strong>
    </div>
    <div class="row">
        <div class="col-md-4">
            <strong>Original Image:</strong>
            <br/>
            <img src="/images/{{ Session::get('imageName') }}" />
        </div>
        <div class="col-md-4">
            <strong>Thumbnail Image:</strong>
            <br/>
            <img src="/thumbnail/{{ Session::get('imageName') }}" />
        </div>
    </div>
    @endif
         
    <form action="{{ route('resizeImagePost') }}" method="post" enctype="multipart/form-data">
        @csrf
        <div class="row">
            <div class="col-md-4">
                <br/>
                <input type="text" name="title" class="form-control" placeholder="Add Title">
            </div>
            <div class="col-md-12">
                <br/>
                <input type="file" name="image" class="image">
            </div>
            <div class="col-md-12">
                <br/>
                <button type="submit" class="btn btn-success">Upload Image</button>
            </div>
        </div>
    </form>
</div>
</body>
</html>
Now at last create two directory in your public folder (1)images and (2)thumbnail and please give permission to that folder and check....at last create two directory in your public folder (1)images and (2)thumbnail and please give permission to that folder and check.... It will help you...

Laravel 8 Google Recaptcha V3 Example

Laravel 8 Google Recaptcha V3 Example

Hi Dev,

Today,I will learn you how to integrate google recaptcha v3 in laravel 8 application. We will talk about laravel 8 google recaptcha implement example tutorial. In this article i will show how to implement google v3 ReCAPTCHA with laravel 8 forms.

This example will give simple way to laravel implement google v3 Recaptcha tutorial, you will learn how to add google v3 Recaptcha with the contact us form in laravel 8.

Here I will give you full example for google recaptcha v3 example in laravel 8. So, let's follow few step to create example of laravel 8 google recaptcha v3 example tutorial.

Step 1 : Install Laravel 8

In the first step, we need to get fresh laravel 8 version application So let's open terminal and run bellow command to install fresh laravel project.

composer create-project --prefer-dist laravel/laravel blog
Step 2 : Database Configuration

In second step, we will make database Configuration for example database name, username, password etc. So lets open .env file and fill all deatils like as bellow:

.env
DB_CONNECTION=mysql
DB_HOST=127.0.0.1
DB_PORT=3306
DB_DATABASE=here your database name(blog)
DB_USERNAME=here database username(root)
DB_PASSWORD=here database password(root)
Step 3 : Install josiasmontag/laravel-recaptchav3

In this step, we need josiasmontag/laravel-recaptchav3 package. you can install google v3 recaptcha validation package in laravel 8 google v3 recaptcha validation app. So let's open terminal and run bellow command:

composer require josiasmontag/laravel-recaptchav3

After install above package you can add providers and aliases in config file. So lets run bellow command to publish the config file:

php artisan vendor:publish --provider="Lunaweb\RecaptchaV3\Providers\RecaptchaV3ServiceProvider"

Then add the site key and secret key on .env file provided by google recaptcha website. Like following:

NOCAPTCHA_SITEKEY=secret_site_key
NOCAPTCHA_SECRET=secret_key 

If you are not register your site with google v3 recaptcha website. So, you can Click Here. And registered your site with filing simple google form.

Then you will get a google client id and secret from the google Recaptcha website.

Step 4 : Create Model and Migration

we are going to create google recaptcha v3 application for contactus. so we have to create migration for "contact_us" table and model using laravel 8 php artisan command, so first fire bellow command:

php artisan make:model ContactUs -m

After this command you will find one file in following path "database/migrations" and you have to put bellow code in your migration file for create posts table.

<?php

use Illuminate\Database\Migrations\Migration;
use Illuminate\Database\Schema\Blueprint;
use Illuminate\Support\Facades\Schema;

class CreateContactUsTable extends Migration
{
    /**
    * Run the migrations.
    *
    * @return void
    */
    public function up()
    {
        Schema::create('contact_us', function (Blueprint $table) {
            $table->id();
            $table->string('name');
            $table->string('email');
            $table->string('subject');
            $table->text('message');
            $table->timestamps();
        });
    }

    /**
    * Reverse the migrations.
    *
    * @return void
    */
    public function down()
    {
        Schema::dropIfExists('contact_us');
    }
}

Now you have to run this migration by following command:

php artisan migrate

Now you can add all table column in fillable So let's open model file put bellow code.

app/Models/ContactUs.php
<?php

namespace App\Models;

use Illuminate\Database\Eloquent\Factories\HasFactory;
use Illuminate\Database\Eloquent\Model;

class ContactUs extends Model
{
    use HasFactory;

    protected $table = 'contact_us';

    protected $fillable = ['name', 'email','subject','message'];
}
Step 5: Create Routes

Here, we need to add route for google recaptcha v3 form. so open your "routes/web.php" file and add following route.

routes/web.php
<?php
use App\Http\Controllers\GoogleV3CaptchaController;

Route::get('google-v3-recaptcha', [GoogleV3CaptchaController::class, 'index']);
Route::post('validate-g-recaptcha', [GoogleV3CaptchaController::class, 'validateGCaptch']);
Step 6: Create Controller

After add route, we need to add method of google recaptcha, first put bellow code on your GoogleController.php file

app/Http/Controllers/GoogleV3CaptchaController.php
<?php
 
namespace App\Http\Controllers;
use Illuminate\Http\Request;
use App\Models\ContactUs;
use Validator;
use Session;

class GoogleV3CaptchaController extends Controller
{
    public function index()
    {
        return view('google-v3-recaptcha');
    }
 
    public function validateGCaptch(Request $request)
    {
        $input = $request->all();

        $validator = Validator::make($input,[
            'name' => 'required',
            'email' => 'required',
            'subject' => 'required',
            'message' => 'required',
            'g-recaptcha-response' => 'required',
        ]);

        if ($validator->passes()){
            ContactUs::create($input);
            return redirect('google-v3-recaptcha')->with('status', 'Google V3 Recaptcha has been validated form');
        }

        return redirect()->back()->withErrors($validator)->withInput();
    }
}
Step 7: Create Blade File

Ok, now at last we need to add blade view so first create new file login.blade.php file and put bellow code:

resources/views/google-v3-recaptcha.blade.php
<!DOCTYPE html>
<html>
<head>
    <title>How to Use Google V3 Recaptcha Validation In Laravel 8 Form</title>
    <meta name="csrf-token" content="{{ csrf_token() }}">
    <link rel="stylesheet" href="https://stackpath.bootstrapcdn.com/bootstrap/4.5.2/css/bootstrap.min.css">
</head>
<body>
    <div class="container mt-4">
        @if(session('status'))
            <div class="alert alert-success">
                {{ session('status') }}
            </div>
        @endif
        <div class="card">
            <div class="card-header text-center font-weight-bold">
                <h2>Laravel 8 Contact Us - Adding Google V3 Recaptcha</h2>
            </div>
            <div class="card-body">
                <form name="g-v3-recaptcha-contact-us" id="g-v3-recaptcha-contact-us" method="post" action="{{url('validate-g-recaptcha')}}">
                    @csrf
                    <div class="form-group">
                        <label for="exampleInputEmail1">Name</label>
                        <input type="text" id="name" name="name" class="@error('name') is-invalid @enderror form-control">
                        @error('name')
                            <div class="alert alert-danger mt-1 mb-1">{{ $message }}</div>
                        @enderror
                    </div>          
                    <div class="form-group">
                        <label for="exampleInputEmail1">Email</label>
                        <input type="email" id="email" name="email" class="@error('email') is-invalid @enderror form-control">
                        @error('email')
                            <div class="alert alert-danger mt-1 mb-1">{{ $message }}</div>
                        @enderror
                    </div>           
                    <div class="form-group">
                        <label for="exampleInputEmail1">Subject</label>
                        <input type="text" id="subject" name="subject" class="@error('subject') is-invalid @enderror form-control">
                        @error('subject')
                            <div class="alert alert-danger mt-1 mb-1">{{ $message }}</div>
                        @enderror
                    </div>      
                    <div class="form-group">
                        <label for="exampleInputEmail1">Message</label>
                        <textarea name="message" class="@error('description') is-invalid @enderror form-control"></textarea>
                        @error('message')
                            <div class="alert alert-danger mt-1 mb-1">{{ $message }}</div>
                        @enderror
                    </div>
                    <div class="form-group">
                        <input type="hidden" name="g-recaptcha-response" id="recaptcha">
                    </div>
                    <button type="submit" class="btn btn-primary">Submit</button>
                </form>
            </div>
        </div>
    </div>    
    <script src="https://www.google.com/recaptcha/api.js?render={{ config('services.recaptcha.sitekey') }}"></script>
    <script>
             grecaptcha.ready(function() {
                 grecaptcha.execute('{{ config('services.recaptcha.sitekey') }}', {action: 'contact'}).then(function(token) {
                    if (token) {
                      document.getElementById('recaptcha').value = token;
                    }
                 });
             });
    </script>
    <!-- <script src="https://www.google.com/recaptcha/api.js?render={{ config('services.recaptcha.sitekey') }}"></script> -->
    
</body>
</html>

Now we are ready to run our google recaptcha v3 example with laravel 8 so run bellow command for quick run:

php artisan serve

Now you can open bellow URL on your browser:

localhost:8000/google-v3-recaptcha

It will help you....

Laravel 8 Custom Error Page Tutorial

how to create custom error page in laravel?

Hi Dev,

Today,I will learn you how engender Custom Error Page in laravel 8. we will show example of laravel 8 custom error page example . you will learn how to engender custom error page in laravel 8. you will learn how to engender 404 error page in laravel 8. we will avail you to give example of how to set 404 error page in laravel 8. if you optate to optically discern example of laravel 8 custom 404 page then you are a right place. Let's get commenced with laravel 8 incipient error page example.

You require to engender blade file like 404.blade.php, 405.blade.php etc on errors(resources/view.errors) directory in laravel 8. you can optically discern i engendered 404 blade file and check it on your project.

Virtually we are utilizing theme for front-end or backend side and we always probing for set 404, 500 or 505 error page design from there that we utilized for project. So it is a very simple and facile way to engender custom 404 page in laravel 8 project. i integrated below screen shot of laravel 8 error page design.

Now you have to just engender "errors" folder in your resources directory and then after you require to engender 404.blade.file inside that folder. So, fundamentally laravel 8 will stetted default design, but if you engendered 404 file into "errors" directory then it will take from there

So, you just need to engender 404 blade file and put your own code like i integrated then you can simply check it out.

resources/views/errors/404.blade.php
<!DOCTYPE html>
<html>
<head>
   <title>Custom Error Page</title>
   <link rel="stylesheet" href="https://maxcdn.bootstrapcdn.com/bootstrap/4.0.0-beta.2/css/bootstrap.min.css">
    <script src="https://maxcdn.bootstrapcdn.com/bootstrap/4.0.0-beta.2/js/bootstrap.min.js" ></script>
    <style type="text/css">
       .error-div{
          margin-top: 200px;
          background: #c1c1c1;
          padding: 70px;
          border-radius: 5px;
       }
       .error-div h1{
          font-size: 50px;
         font-weight: bold;          
       }
       .error-div h6{
          font-family: ubuntu;
          font-size: 20px;
       }
    </style>
</head>
<body>
   <div class="container">
      <div class="row text-center">
        <div class="col-md-6 offset-md-3 error-div">
          <h1>404</h1>
          <h6>Page not found - Itwebtuts.com</h6>
        </div>
      </div>
    </div>
</body>
</html>

After you can simply run your application by following command:

php artisan serve

Now you can open following url and you will see error page as above:

http://localhost:8000/okgays

Now you can simply check it out.

Output

I will help you...

Laravel 8 Autocomplete Search using Typeahead JS Example

 autocomplete search using typeahead

Hi Guys,

Today,I will learn you how to create autocomplete search using typeahead js in laravel 8. We will show example of laravel 8 autocomplete search using typeahead js. We will share with you how to build search autocomplete box using jQuery typehead js with ajax in laravel 8.i will use jQuery typehead js plugin, bootstrap library and ajax to search autocomplete in laravel 8 app.

Here, I will give you full example for Laravel 8 ajax autocomplete search using typeahead js as bellow.

Step 1: Install Laravel 8 Application

we are going from scratch, So we require to get fresh Laravel application using bellow command, So open your terminal OR command prompt and run bellow command:

composer create-project --prefer-dist laravel/laravel Laravel8TypeheadTutorial
Step 2: Database Configuration

In this step, configure database with your downloded/installed laravel 8 app. So, you need to find .env file and setup database details as following:

DB_CONNECTION=mysql
DB_HOST=127.0.0.1
DB_PORT=3306
DB_DATABASE=db name
DB_USERNAME=db user name
DB_PASSWORD=db password
Step 3: Add Dummy Record

In this step,I will Generate dummy records into database table users. So, navigate database/seeders/ directory and open DatabaseSeeder.php file. Then add the following two line of code it.

use App\Models\User;

User::factory(100)->create();

After that, open command prompt and navigate to your project by using the following command:

  cd / Laravel8TypeheadTutorial

Now, open again your terminal and type the following command on cmd to create tables into your selected database:

php artisan migrate

Next, run the following database seeder command to generate dummy data into database:

php artisan db:seed --force
Step 4: Create Routes

Now in this step, open your web.php file, which is located inside routes directory. Then add the following routes into web.php file:

use App\Http\Controllers\AutocompleteSearchController;
Route::get('/autocomplete-search', [AutocompleteSearchController::class, 'index'])->name('autocomplete.search.index');
Route::get('/autocomplete-search-query', [AutocompleteSearchController::class, 'query'])->name('autocomplete.search.query');
Step 5: Creating Auto Complete Search Controller

Here in this step,I will create search AutocompleteSearch controller by using the following command.

php artisan make:controller AutocompleteSearchController

The above command will create AutocompleteSearchController.php file, which is located inside

Laravel8TypeheadTutorial/app/Http/Controllers/ directory.

Then add the following controller methods into AutocompleteSearchController.blade.php file:

<?php

namespace App\Http\Controllers;

use Illuminate\Http\Request;
use App\Models\User;

class AutocompleteSearchController extends Controller
{
    public function index()
    {
      return view('autocompleteSearch');
    }

    public function query(Request $request)
    {
      $input = $request->all();

        $data = User::select("name")
                  ->where("name","LIKE","%{$input['query']}%")
                  ->get();
   
        return response()->json($data);
    }
}
Step 6: Create Blade File

In step 6, create new blade view file that named autocompleteSearch.blade.php inside resources/views directory for ajax get data from database.

<!DOCTYPE html>
<html>
<head>
  <title>Autocomplete Search Using Typehead | Laravel 8</title>
  <link rel="stylesheet" href="https://stackpath.bootstrapcdn.com/bootstrap/4.4.1/css/bootstrap.min.css" integrity="sha384-Vkoo8x4CGsO3+Hhxv8T/Q5PaXtkKtu6ug5TOeNV6gBiFeWPGFN9MuhOf23Q9Ifjh" crossorigin="anonymous">
</head>
<body>
  <div class="container">
    <div class="row">
      <div class="col-md-6 offset-md-3 mt-5">
        <h5>Laravel 8 Autocomplete Search Using Typehead</h5>
        <input type="text" class="form-control typeahead">
      </div>
    </div>
  </div>
</body>
<script src="https://code.jquery.com/jquery-3.4.1.min.js"></script>
<script src="https://cdnjs.cloudflare.com/ajax/libs/bootstrap-3-typeahead/4.0.2/bootstrap3-typeahead.min.js" ></script>
<script type="text/javascript">
  var path = "{{ url('autocomplete-search-query') }}";
    $('input.typeahead').typeahead({
        source:  function (query, process) {
          return $.get(path, { query: query }, function (data) {
              return process(data);
          });
        }
    });
</script>
</html>

Now we are ready to run our laravel 8 autocomplete search using typeahead js example so run bellow command for quick run:

php artisan serve

Now you can open bellow URL on your browser:

http://localhost:8000/autocomplete-search

It will help you..

Laravel 8 Login with Github Example

laravel 8 login with Github account

Hi Men

These days, I can give an explanation for you step by step login with Github Account in laravel 8 the usage of socialite. laravel eight socialite provide api to login with github account. you could effortlessly login using Github in laravel eight utility.

As we realize social media is a turn out to be increasingly popular inside the global. each one have social account like github, facebook and so forth. i suppose also most of have github account. So if for your utility have login with social then it grow to be exceptional. to procure more humans hook up with your website because most of human beings does not need to fill sign on or check in form. If there login with social than it end up splendid.

So in case you want to also enforce login with github account then i can assist you grade by grade education. let's comply with educational and implement it.

Step 1 : Install Laravel 8

Inside the first step, we need to get clean laravel 8 model software So permit's open terminal and run bellow command to put in clean laravel assignment.

composer create-project --prefer-dist laravel/laravel blog
Step 2 : Database Configuration

In second step, we will make database Configuration as an instance database call, username, password and many others. So we could open .env record and fill all deatils like as bellow:

.env
DB_CONNECTION=mysql
DB_HOST=127.0.0.1
DB_PORT=3306
DB_DATABASE=here your database name(blog)
DB_USERNAME=here database username(root)
DB_PASSWORD=here database password(root)
Step 3 : Install Jetstream

Here we need auth scaffolding of jetstream. i will give full example for how to install jetstream so click here.

Step 4 : Install Socialite In this step, we need laravel/socialite package. you can install socialite package using bellow command so let's run bellow command :
composer require laravel/socialite

After install above package you can add providers and aliases in config file, Now open config/app.php file and add service provider and aliase.

config/app.php
....

'providers' => [
    ....
    Laravel\Socialite\SocialiteServiceProvider::class,
],

'aliases' => [
    ....
    'Socialite' => Laravel\Socialite\Facades\Socialite::class,
],

....
Step 5: Create Github Api

Here we need Github account that way we can get information of other user. so if you don't have Github account then you can create from here : Github. you can find bellow screen :

Laravel 8 Login with Github Example

Now you have to click on Developer settings

Laravel 8 Login with Github

Next you have to click on OAuth Apps

laravel 8 socialite Github login

Here you have to click on Register a new application

 Github login with laravel 8

Here you have to create on Register a new OAuth application

login with gmail laravel 8

Now Redy Github APi

laravel 8 socialite Github tutorial

Now you have to set app id, secret and call back url in config file so open config/services.php and set id and secret this way:

config/services.php
	return [
    ....
    'github' => [
        'client_id' => 'app id',
        'client_secret' => 'add secret',
        'redirect' => 'http://your-callback-url',
    ],
]
Step 6: Add Database Column

In this step first we have to create migration for add Github Id in your user table. So let's run bellow command:

php artisan make:migration add_github_id_column
<?php
  
use Illuminate\Support\Facades\Schema;
use Illuminate\Database\Schema\Blueprint;
use Illuminate\Database\Migrations\Migration;
   
class AddGithubIdColumn extends Migration
{
    /**
     * Run the migrations.
     *
     * @return void
     */
    public function up()
    {
        Schema::table('users', function ($table) {
            $table->string('github_id')->nullable();
        });
    }
   
    /**
     * Reverse the migrations.
     *
     * @return void
     */
    public function down()
    {
        Schema::table('users', function ($table) {
            $table->dropColumn('github_id');
         });
    }
}
Update mode like this way: app/Models/User.php
<?php

namespace App\Models;

use Illuminate\Contracts\Auth\MustVerifyEmail;
use Illuminate\Database\Eloquent\Factories\HasFactory;
use Illuminate\Foundation\Auth\User as Authenticatable;
use Illuminate\Notifications\Notifiable;
use Laravel\Fortify\TwoFactorAuthenticatable;
use Laravel\Jetstream\HasProfilePhoto;
use Laravel\Sanctum\HasApiTokens;

class User extends Authenticatable
{
    use HasApiTokens;
    use HasFactory;
    use HasProfilePhoto;
    use Notifiable;
    use TwoFactorAuthenticatable;

    /**
     * The attributes that are mass assignable.
     *
     * @var array
     */
    protected $fillable = [
        'name',
        'email',
        'password',
        'github_id'
    ];

    /**
     * The attributes that should be hidden for arrays.
     *
     * @var array
     */
    protected $hidden = [
        'password',
        'remember_token',
        'two_factor_recovery_codes',
        'two_factor_secret',
    ];

    /**
     * The attributes that should be cast to native types.
     *
     * @var array
     */
    protected $casts = [
        'email_verified_at' => 'datetime',
    ];

    /**
     * The accessors to append to the model's array form.
     *
     * @var array
     */
    protected $appends = [
        'profile_photo_url',
    ];
}
Step 7: Create Routes

Here, we need to add resource route for login with gmail account. so open your "routes/web.php" file and add following route.

routes/web.php
<?php
use Illuminate\Support\Facades\Route;
use App\Http\Controllers\Auth\GithubController;

/*
|--------------------------------------------------------------------------
| Web Routes
|--------------------------------------------------------------------------
|
| Here is where you can register web routes for your application. These
| routes are loaded by the RouteServiceProvider within a group which
| contains the "web" middleware group. Now create something great!
|
*/

Route::get('auth/github', [GithubController::class, 'redirectToGithub']);
Route::get('auth/github/callback', [GithubController::class, 'handleGithubCallback']);
Step 8: Create Controller

After add route, we need to add method of github auth that method will handle github callback url and etc, first put bellow code on your GithubController.php file

app/Http/Controllers/Auth/GithubController.php
<?php
  
namespace App\Http\Controllers\Auth;
  
use App\Http\Controllers\Controller;
use Socialite;
use Auth;
use Exception;
use App\Models\User;
  
class GithubController extends Controller
{
    /**
     * Create a new controller instance.
     *
     * @return void
     */
    public function redirectToGithub()
    {
        return Socialite::driver('github')->redirect();
    }
      
    /**
     * Create a new controller instance.
     *
     * @return void
     */
    public function handleGithubCallback()
    {
        try {
    
            $user = Socialite::driver('github')->user();
     
            $finduser = User::where('github_id', $user->id)->first();
     
            if($finduser){
     
                Auth::login($finduser);
    
                return redirect('/home');
     
            }else{
                $newUser = User::create([
                    'name' => $user->name,
                    'email' => $user->email,
                    'github_id'=> $user->id,
                    'password' => encrypt('123456dummy')
                ]);
    
                Auth::login($newUser);
     
                return redirect('/home');
            }
    
        } catch (Exception $e) {
            dd($e->getMessage());
        }
    }
}
Step 9: Update Blade File

Ok, now at last we need to add blade view so first create new file login.blade.php file and put bellow code:

resources/views/auth/login.blade.php
<x-guest-layout>
    <x-jet-authentication-card>
        <x-slot name="logo">
            <x-jet-authentication-card-logo />
        </x-slot>

        <x-jet-validation-errors class="mb-4" />

        @if (session('status'))
            <div class="mb-4 font-medium text-sm text-green-600">
                {{ session('status') }}
            </div>
        @endif

        <form method="POST" action="{{ route('login') }}">
            @csrf

            <div>
                <x-jet-label value="{{ __('Email') }}" />
                <x-jet-input class="block mt-1 w-full" type="email" name="email" :value="old('email')" required autofocus />
            </div>

            <div class="mt-4">
                <x-jet-label value="{{ __('Password') }}" />
                <x-jet-input class="block mt-1 w-full" type="password" name="password" required autocomplete="current-password" />
            </div>

            <div class="block mt-4">
                <label class="flex items-center">
                    <input type="checkbox" class="form-checkbox" name="remember">
                    <span class="ml-2 text-sm text-gray-600">{{ __('Remember me') }}</span>
                </label>
            </div>

            <div class="flex items-center justify-end mt-4">
                @if (Route::has('password.request'))
                    <a class="underline text-sm text-gray-600 hover:text-gray-900" href="{{ route('password.request') }}">
                        {{ __('Forgot your password?') }}
                    </a>
                @endif

                <x-jet-button class="ml-4">
                    {{ __('Login') }}
                </x-jet-button>

                <a href="{{ url('auth/github') }}" style="margin-top: 0px !important;background: green;color: #ffffff;padding: 5px;border-radius:7px;" class="ml-2">
                  <strong>Login With Github</strong>
                </a> 
            </div>
        </form>
    </x-jet-authentication-card>
</x-guest-layout>
Now we are ready to run our form validation example with laravel 8 so run bellow command for quick run:
php artisan serve
Now you can open bellow URL on your browser:
localhost:8000/login
You will see layout as like bellow: Output
socialite Github laravel 8

It will help you...

Laravel 8 Image Upload Tutorial

Hi Guys, Today,I will learn you how to create Image Upload in laravel 8. We will show example of image upload in laravel 8. you can easyliy create Image Upload in laravel 8 I am going to show you about image upload in laravel 8. this example will help you laravel 8 upload image to database. This article goes in detailed on how to upload and display image in laravel 8. Here, Creating a basic example of laravel 8 image upload with preview. I created simple form with file input. So you have to simple select image and then it will upload in "images" directory of public folder. So you have to simple follow bellow step and get image upload in laravel 8 application. Here, I will give you full example for simply Image Upload using Laravel 8 as bellow. Step 1 : Install Laravel 8 Application we are going from scratch, So we require to get fresh Laravel application using bellow command, So open your terminal OR command prompt and run bellow command:
composer create-project --prefer-dist laravel/laravel blogImageUpload
cd blogImageUpload
Step 2: Create Routes In next step, we will add new two routes in web.php file. One route for generate form and another for post method So let's simply create both route as bellow listed:
Route::get('/upload-image', [ImageUploadController::class, 'index'])->name('image.upload.index');
Route::post('/upload-image/store', [ImageUploadController::class, 'store'])->name('image.upload.store')
Step 3: Create Controller here this step now we should create new controller as ImageUploadController,So run bellow command for generate new controller
php artisan make:controller ImageUploadController
At last step we need to create imageUpload.blade.php file and in this file we will create form with file input button. So copy bellow and put on that file.
<?php

namespace App\Http\Controllers;

use Illuminate\Http\Request;

class ImageUploadController extends Controller
{ 
    /**
     * Write code on Method
     *
     * @return response()
     */
    public function index()
    {
      return view('imageUpload');
    }

    /**
     * Write code on Method
     *
     * @return response()
     */
    public function store(Request $request)
    {
      $request->validate([
            'image' => 'required|image|mimes:jpeg,png,jpg,gif,svg|max:1024',
        ]);
    
        $imageName = time().'.'.$request->image->extension();
     
        $request->image->move(public_path('images'), $imageName);
  
        / store image in database from here /
    
        return redirect()->back()->with('success','Image uploaded successfully.')->with('image',$imageName);
    }
}
Store Image in Storage Folder
$request->image->storeAs('images', $imageName);
// storage/app/images/file.png
Store Image in Public Folder
$request->image->move(public_path('images'), $imageName);
// public/images/file.png
Store Image in S3
$request->image->storeAs('images', $imageName, 's3');
Step 4: Create Blade File At last step we need to create imageUpload.blade.php file and in this file we will create form with file input button. So copy bellow and put on that file. resources/views/imageUpload.blade.php
<!DOCTYPE html>
<html>
<head>
    <title>Laravel 8 Multiple File Upload - Mywebtuts.com</title>
    <link rel="stylesheet" href="https://stackpath.bootstrapcdn.com/bootstrap/4.3.1/css/bootstrap.min.css" integrity="sha384-ggOyR0iXCbMQv3Xipma34MD+dH/1fQ784/j6cY/iJTQUOhcWr7x9JvoRxT2MZw1T" crossorigin="anonymous">
    <link rel="stylesheet" href="https://cdnjs.cloudflare.com/ajax/libs/font-awesome/4.7.0/css/font-awesome.css" integrity="sha256-NuCn4IvuZXdBaFKJOAcsU2Q3ZpwbdFisd5dux4jkQ5w=" crossorigin="anonymous" />
    <link rel="stylesheet" type="text/css" href="https://stackpath.bootstrapcdn.com/font-awesome/4.7.0/css/font-awesome.min.css">
    <script src="https://code.jquery.com/jquery-3.3.1.slim.min.js" integrity="sha384-q8i/X+965DzO0rT7abK41JStQIAqVgRVzpbzo5smXKp4YfRvH+8abtTE1Pi6jizo" crossorigin="anonymous"></script>
    <script src="https://cdnjs.cloudflare.com/ajax/libs/popper.js/1.14.7/umd/popper.min.js" integrity="sha384-UO2eT0CpHqdSJQ6hJty5KVphtPhzWj9WO1clHTMGa3JDZwrnQq4sF86dIHNDz0W1" crossorigin="anonymous"></script>
    <script src="https://stackpath.bootstrapcdn.com/bootstrap/4.3.1/js/bootstrap.min.js" integrity="sha384-JjSmVgyd0p3pXB1rRibZUAYoIIy6OrQ6VrjIEaFf/nJGzIxFDsf4x0xIM+B07jRM" crossorigin="anonymous"></script>
</head>
<body>
<div class="container">
    <div class="row">
        <div class="col-md-6 offset-3 mt-5">
            <div class="card mt-5">
                <div class="card-header text-center bg-primary">
                    <h2 class="text-white"> <strong>Multiple File Upload</strong></h2>
                </div>
                <div class="card-body">
                  @if ($message = Session::get('success'))
		            <div class="alert alert-success alert-block">
		                <button type="button" class="close" data-dismiss="alert">×</button>
		                <strong>{{ $message }}</strong>
		            </div>
		          @endif
		            @if (count($errors) > 0)
		                <ul class="alert alert-danger pl-5">
		                  @foreach($errors->all() as $error)
		                     <li>{{ $error }}</li> 
		                  @endforeach
		                </ul>
		            @endif
		            <form method="post" action="{{ route('multiple.file.upload.store') }}" enctype="multipart/form-data">
		              @csrf
		              <div class="input-group file-div control-group lst increment" >
		                <input type="file" name="files[]" class="myfrm form-control">
		                <div class="input-group-btn"> 
		                  <button class="btn btn-success add-btn" type="button"><i class="fldemo fa fa-plus"></i></button>
		                </div>
		              </div>
		              <div class="clone hide">
		                <div class="file-div control-group lst input-group" style="margin-top:10px">
		                  <input type="file" name="files[]" class="myfrm form-control">
		                  <div class="input-group-btn"> 
		                    <button class="btn btn-danger" type="button"><i class="fldemo fa fa-close"></i></button>
		                  </div>
		                </div>
		              </div>
		              <div class="row">
		                <div class="col-md-12 text-center mt-4">
		                  <button type="submit" class="btn btn-success rounded-0"><i class="fa fa-save"></i> Save</button>
		                </div>
		              </div>
		          </form>
                </div>
            </div>
        </div>
    </div>
</div>
<script type="text/javascript">
    $(document).ready(function() {
      $(".add-btn").click(function(){
          var lsthmtl = $(".clone").html();
          $(".increment").after(lsthmtl);
      });
      $("body").on("click",".btn-danger",function(){
          $(this).parents(".file-div").remove();
      });
    });
</script>
</body>
</html>
Now we are ready to run our custom validation rules example so run bellow command for quick run:
php artisan serve
Now you can open bellow URL on your browser:
http://localhost:8000/upload-image
It will help you...